breakfast

Hummingbird Bread

Hummingbird Bread

You ever step into the kitchen ready to bake something wonderful, and then it all just kinda… flops? That’s the day I had earlier this week. Set on making the yummiest, springiest hummingbird bread for all of you, I bombed not one, not two, but THREE loaves of bread before finally landing on a recipe that I love. What I thought would be a surefire thing turned out to be a hot mess, but we got there! Today’s recipe, after all that, is worth the effort.

Hummingbird Bread

What is Hummingbird Bread?

Hummingbird cake is a Southern staple. Lightly sweetened with ripe mashed bananas and crushed pineapples, these cakes are intensely moist and flavorful. Most include chopped nuts and some form of a cream cheese frosting, too! In the past, I’ve made hummingbird layer cake, hummingbird muffins, and even a hummingbird bundt cake, and I will tell you that they’re all delish. Today, however, we’re pairing things down for a simple, two-step hummingbird quick bread.

Hummingbird Bread by Wood and Spoon Blog. This is a tender, moist quick bread made with ripe mashed banana, crushed pineapple, and a pecan streusel. This recipe is a simple spring breakfast loaf and is perfect for Easter celebrations. Learn how to make this bread in under an hour on thewoodandspoon.com

What is a Quick Bread?

Quick breads are just that- QUICK! While most sandwich loaves and other risen breads require yeast for its rising, quick bread are leavened by baking powder or baking soda and require no rise time. Instead, the rising all happens during the baking, which is good news- less wait time, more eating. Quick breads like this hummingbird loaf are generally very most, sweet, and textured like a dense cake.

Hummingbird Bread

How to Make Hummingbird Bread

We start with the wet ingredients! Melted butter combines with sugar and brown sugar before we beat in the mashed bananas, eggs, and crushed pineapple. Remember- when baking, brown bananas are your friend! Use ultra-ripe bananas for the sweetest and most flavorful cakes. Next, we stir in the flour, leavening, cinnamon, and salt. The batter pours into a large loaf pan before being topped with a simple cold butter streusel made with brown sugar and chopped pecans. The streusel will add a little texture and sweet/salty flavor to the final bread. Pop the whole thing in the oven for a 40 minute bake and voila!

Hummingbird Bread

How to Make Quick Breads in Advance

Loaves likes this hummingbird bread are a great make-ahead option. Simply bake up the loaves and cool completely before removing from the pan. Wrap the finished loaves in plastic wrap and then aluminum foil. You can store them safely in the freezer for up to 4 months, however, I think they’re best when eaten within a month.

Give this recipe a try this spring and let me know what you think! Happy Tuesday and happy baking!

Hummingbird Bread

If you like this hummingbird bread, you should try:

Easy Banana Zucchini Bread
Banana Bread Cake
Cinnamon Streusel Bread
Carrot Pound Cake

Print

Hummingbird Bread

5 Stars 4 Stars 3 Stars 2 Stars 1 Star

No reviews

This hummingbird bread is a lightly sweetened loaf made with banana, crushed pineapple, and a pecan streusel topping!

  • Author: Kate Wood
  • Prep Time: 10
  • Cook Time: 40
  • Total Time: 50 minutes
  • Yield: 9 Servings
  • Category: Quick Bread

Ingredients

Units

For the streusel:

  • 2 1/2 tablespoons flour
  • 2 tablespoons brown sugar
  • 1/4 teaspoon cinnamon
  • 1/8 teaspoon salt
  • 2 tablespoons unsalted butter, cold
  • 1/4 cup chopped pecan halves

For the bread:

  • 1/2 cup unsalted butter, melted
  • 3/4 cup (150 gm) sugar
  • 1/4 cup (55 gm) brown sugar, packed
  • 1 large (120 gm) banana, mashed
  • 2 large eggs, room temperature
  • 1/2 cup (115 gm) drained crushed pineapple
  • 1 teaspoon vanilla extract
  • 1–1/2 cups (190 gm) flour
  • 3/4 teaspoon salt
  • 1 1/4 teaspoon baking powder
  • 1 1/4 teaspoon baking soda
  • 1 teaspoon cinnamon

Instructions

To prepare the streusel:

  1. Combine the flour, sugar, cinnamon, and salt in a medium sized bowl. Dice the butter and then cut into the flour using the back of a fork or a pastry cutter. Once the butter is well integrated, about pea-sized clumps, toss in the pecan pieces. Set aside until ready to use.

To prepare the bread:

  1. Preheat the oven to 350 degrees and lightly grease a 9”x5” loaf pan with baking spray.
  2. Combine the melted butter, sugar, and brown sugar, stirring until combined. Add in the banana, eggs, pineapple, and vanilla stirring until thoroughly combined. In a small bowl, combine the remaining dry ingredients and then add them to the butter mixture. Stir until combined, scraping the sides of the bowl as needed.
  3. Pour the prepared batter into the pan. Sprinkle the streusel on top and bake in the preheated oven until a toothpick inserted comes out clean, about 40-43 minutes. Allow to cool 20 minutes before removing the loaf from the pan.

Did you make this recipe?

Share a photo and tag us — we can’t wait to see what you’ve made!

Hummingbird Bread Read More »

Fluffy Orange Rolls

Fluffy Orange Rolls by Wood and Spoon. These are intensely fluffy orange rolls filled with orange zest-scented sugar and topped with a cream cheese topping. Prepare these flavored rolls for your weekend baking and learn how fun it is to make breakfast sweet rolls! The recipe is on thewoodandspoon.com .

Good news: I AM SO EXCITED ABOUT TODAY’S RECIPE!! I mean, truly. Don’t get me wrong- I never share recipes here that I don’t like, but it’s been a hot minute since I’ve sent in-process videos to my mom saying, “ LOOK AT HOW FLUFFY THESE ARE!” But today, I did. These fluffy orange rolls are, in fact, the fluffiest of fluffy, and I’m super proud to share them today. So there. 

Fluffy Orange Rolls by Wood and Spoon. These are intensely fluffy orange rolls filled with orange zest-scented sugar and topped with a cream cheese topping. Prepare these flavored rolls for your weekend baking and learn how fun it is to make breakfast sweet rolls! The recipe is on thewoodandspoon.com .

Fluffy Orange Rolls by Wood and Spoon. These are intensely fluffy orange rolls filled with orange zest-scented sugar and topped with a cream cheese topping. Prepare these flavored rolls for your weekend baking and learn how fun it is to make breakfast sweet rolls! The recipe is on thewoodandspoon.com .

Several years ago, my overnight cinnamon rolls became a hit on this site. Then, a couple of year after, my mini cinnamon rolls snuck into the top ten most popular recipes. So when I set out to make today’s orange rolls, I knew I had to include the easy, fluffy goodness that you guys were accustomed to. And let me tell you- we nailed it. These have it all: the fluff, the orange flavor, the barely sweetened cream cheese frosting, and even the ease of an option for an overnight rise. These orange rolls exceeded my expectations, so I’m really hoping you love them too.

Fluffy Orange Rolls by Wood and Spoon. These are intensely fluffy orange rolls filled with orange zest-scented sugar and topped with a cream cheese topping. Prepare these flavored rolls for your weekend baking and learn how fun it is to make breakfast sweet rolls! The recipe is on thewoodandspoon.com .

Making Fluffy Orange Rolls

Making these fluffy orange rolls isn’t difficult, but they are a process. These rolls require two rises, rolling, kneading, and more- not for the faint of heart. But, don’t worry- you can totally do this. Just read the instruction carefully and have your ingredients prepped. One of the trickiest parts, in my opinion, is the rise. How do you know if they’re done? Have they risen enough? Did I over-proof them? Here are a few tips:

1. Proof your orange rolls is a warm spot of your kitchen. Yeast is most active in a slightly warm environment. So if you have a fancy oven with a “Proof” setting, use it! Otherwise, simply preheat your oven for the briefest of seconds just to get it balmy. Then, turn off your oven, cover the rolls, and let them rise.
2. Use the poke test! I recommend give your dough a little poke when you suspect the rise time is nearly over. When dough is appropriately proofed, a finger poke will barely fill back in, not leaving a big indent. 
3. Look for color. I regularly over-bake my cinnamon rolls because I don’t want them to deflate. Unfortunately, that usually leaves me with rolls that are drier than they should be. Look for the tops to just barely begin to turn golden- they will not be brown. 

Fluffy Orange Rolls by Wood and Spoon. These are intensely fluffy orange rolls filled with orange zest-scented sugar and topped with a cream cheese topping. Prepare these flavored rolls for your weekend baking and learn how fun it is to make breakfast sweet rolls! The recipe is on thewoodandspoon.com .

Fluffy Orange Rolls by Wood and Spoon. These are intensely fluffy orange rolls filled with orange zest-scented sugar and topped with a cream cheese topping. Prepare these flavored rolls for your weekend baking and learn how fun it is to make breakfast sweet rolls! The recipe is on thewoodandspoon.com .

At the risk of being totally overkilll, let me just say that I LOVE THESE FLUFFY ORANGE ROLLS!!!! I hope you do too. Happy baking!

Print

Fluffy Orange Rolls

5 Stars 4 Stars 3 Stars 2 Stars 1 Star

No reviews

These fluffy orange rolls are soft breakfast pastries with an orange sugar filling and a cream cheese frosting on top!

  • Author: Kate Wood
  • Prep Time: 30
  • Cook Time: 20
  • Total Time: 2 hours
  • Yield: 18 Rolls
  • Category: Breakfast

Ingredients

For the dough:

  • ½ cup (120 gm) milk, lukewarm
  • ¼ cup (60 gm) water, lukewarm
  • 1 tablespoon active dry yeast
  • ½ cup (120 gm) orange juice (see notes)
  • 6 tablespoons (85 gm) unsalted butter, melted but not too hot
  • 1 large egg plus 2 egg yolks
  • 1/4 cup (50 gm) brown sugar
  • 1/4 cup (50 gm) sugar
  • 2 teaspoons orange zest (see notes)
  • 2–3/4 cups (385 gm) all-purpose flour
  • 1–1/2 cups (210 gm) bread flour
  • ½ teaspoon salt

For the filling:

  • 5 tablespoons (70 gm) unsalted butter, melted
  • ¾ cup (150 gm) brown sugar
  • 2 teaspoons orange zest (see notes)
  • Pinch of salt

For the frosting:

  • 4 ounces cream cheese, at room temperature
  • ¼ cup (55 gm) unsalted butter, at room temperature
  • 1 cup (115 gm) powdered sugar
  • 2+ tablespoons of orange juice

Instructions

To prepare the dough:

  1. In the bowl of a stand mixer or a large bowl, combine the milk and water and sprinkle the yeast over top of it. Allow the yeast to dissolve, about 5 minutes. Stir in the orange juice, butter, egg, egg yolks, and brown sugar, sugar, and orange zest until smooth. In a small bowl, combine the flour, bread flour, and salt. Dump about half of the dry ingredients into the yeast mixture and stir until combined. Pour in the remaining dry ingredients and knead in the bowl using the dough hook attachment until smooth and slightly tacky, about 7 minutes. If you notice your dough isn’t pulling away from the sides of the bowl or it’s too wet, add flour 2 tablespoons at a time until the dough pulls away from the sides of the bowl and forms a little dough “tornado” around the dough hook. Once done kneading, place the dough into a large lightly greased bowl and cover tightly with plastic wrap to double in size, about 1-1/2 – 2 hours (see notes).
  2. Once the dough has risen, dump it out onto a lightly floured surface. Use a rolling pin to roll it out into a large rectangle about 11”x21” in size. Combine the melted butter, brown sugar, orange zest, and salt in a small bowl and spread the mixture over top of the dough, leaving a 1” perimeter of dough without any filling on it.  Starting with one of the long ends, tightly roll the dough from end to end and pinch the edges together to seal. Cut the dough into 1-1/2” sections and lay them out 2” apart in a lightly greased baking dish. Cover with plastic wrap and allow to rise a second time for about 25-30 minutes. In the meantime, preheat the oven to 350 degrees. Once preheated, bake in the oven for about 20-22 minutes or until the edges are barely golden and the internal temp is 190 degrees. Remove from the oven and prepare your frosting.

To prepare the frosting:

  1. Cream the cream cheese and butter in large bowl at medium speed until smooth, about 1 minute. Add the powdered sugar and orange juice and beat to combine. Add additional OJ to thin out the frosting or more powdered sugar to thicken it. You can also gently warm the frosting to pour over the rolls as a glaze. Cinnamon rolls are best enjoyed warm.

Notes

  • You’ll end up zesting about 3 oranges for this recipe. I recommend zesting the oranges and reserving the juice- you’ll have just enough to meet the zest and juice needs for this recipe!
  • I recommend allowing the dough to rise in a warm spot in your kitchen. If your oven has a proof mode, consider using that. Otherwise, you briefly preheat the oven to the lowest possible temperature and then place the covered dough inside- just make sure the oven isn’t hot! For overnight cinnamon rolls, follow the instructions as is above up through the cutting of the dough. Cover the pan of prepared dough and allow the second rise to happen in the fridge overnight. In the morning, remove the rolls from the fridge while you preheat the oven to 350 degrees. Bake as instructed above.

Did you make this recipe?

Share a photo and tag us — we can’t wait to see what you’ve made!

Fluffy Orange Rolls Read More »

Vanilla Bean Scones

Vanilla Bean Scones by Wood and Spoon Blog. This simple recipe for buttery cream scones is a copycat for Starbucks vanilla scones. The recipe makes a dozen small scones flavored with vanilla bean paste and topped with a simple icing. Learn more about the recipe on thewoodandspoon.com .

Today is all about a sweet breakfast favorite of mine- scones! It’s been a hot minute since I’ve shared a scone recipe, but this one is worth keeping around. These vanilla bean scones are easy to make, the absolute perfect size, and a mild (but delicious!) flavor that everyone can rally around. Grab your coffee and let’s dive in!

Vanilla Bean Scones by Wood and Spoon Blog. This simple recipe for buttery cream scones is a copycat for Starbucks vanilla scones. The recipe makes a dozen small scones flavored with vanilla bean paste and topped with a simple icing. Learn more about the recipe on thewoodandspoon.com .

This recipe is 100% inspired by Starbucks. If you’ve been there before (and honestly, who hasn’t?) you’ve seen the vanilla bean scones. I don’t generally go nuts for the snacks at Starbucks (unless it’s marble loaf!), but I do really like the scones. And because scones are one of my favorite simple breakfast pastries to whip up, I knew this recipe was the next one to tackle. With a tender, buttery crumb, crisp edges, and the simplest drizzle-on icing, these vanilla bean scones are a great option for novice bakers with big taste buds.

Vanilla Bean Scones by Wood and Spoon Blog. This simple recipe for buttery cream scones is a copycat for Starbucks vanilla scones. The recipe makes a dozen small scones flavored with vanilla bean paste and topped with a simple icing. Learn more about the recipe on thewoodandspoon.com .

How to Make Vanilla Bean Scones

We start these scones by combining the dry ingredients in a large bowl. Flour, cake flour, baking powder, salt and sugar come together with a simple whisk. Next, we use a pastry cutter to incorporate ice cold butter in small bits throughout. Finally, heavy cream and vanilla bean paste add into the mix until a stiff, shaggy dough comes together. Divide the dough in two, and pat each hunk into a flat round disk about 1-1/2″ thick. Use a sharp knife to cut each disk into 6 wedges and brush the tops with the remaining heavy cream. Cover the pan with plastic wrap and pop in the freezer while you preheat the oven. Ice cold scones make for fluffy, risen scones, so don’t skip this step! Once the scones have baked, stir together the icing of sugar, vanilla, and milk. Drizzle or spread on top before enjoying.

Vanilla Bean Scones by Wood and Spoon Blog. This simple recipe for buttery cream scones is a copycat for Starbucks vanilla scones. The recipe makes a dozen small scones flavored with vanilla bean paste and topped with a simple icing. Learn more about the recipe on thewoodandspoon.com .

The good news? These scones reheat like a dream. Just pop any leftover iced scones in the toaster oven and reheat until the edges and tops crisp back up. Honestly, I may even like them better reheated, but don’t tell anyone. The reheat secret will be our little secret. Give these vanilla bean scones a try this week and let me know what you think! Happy baking!

Vanilla Bean Scones by Wood and Spoon Blog. This simple recipe for buttery cream scones is a copycat for Starbucks vanilla scones. The recipe makes a dozen small scones flavored with vanilla bean paste and topped with a simple icing. Learn more about the recipe on thewoodandspoon.com .
Print

Vanilla Bean Scones

5 Stars 4 Stars 3 Stars 2 Stars 1 Star

No reviews

This recipe for vanilla bean scones makes 12 small cream scones flavored with vanilla bean paste and topped with a sugar icing!

  • Author: Kate
  • Prep Time: 10
  • Cook Time: 20
  • Total Time: 45
  • Yield: 12 Scones
  • Category: Pastry

Ingredients

For the scones:

  • 1 ½ cups (190 gm) all-purpose flour
  • 1 1-/2 cups (180 gm) cake flour
  • 1 tablespoon (9 gm) baking powder
  • 1 teaspoon salt
  • ½ cup (100 gm) sugar
  • ½ cups unsalted butter, cold and chopped
  • 1 ½ cups (360 ml) heavy cream, divided
  • 2 teaspoons vanilla bean paste

For the glaze:

  • 1 cup (130 gm) confectioner’s sugar
  • 1 teaspoon vanilla bean paste
  •  Milk

Instructions

  1. Preheat the oven to 425 degrees Fahrenheit and prepare a sheet pan with a sheet of parchment paper.
  2. In a large bowl, whisk together the flours, baking powder, salt, and sugar, until combined. Use a pastry cutter to  integrate the cold butter into the dry ingredients until reduced to small, pea-sized lumps throughout. Set aside 2 tablespoons of the cream in a small bowl for brushing the top of the scones. In a measuring cup, combine the remaining heavy cream and vanilla bean paste. Pour the vanilla cream mixture on the dry ingredients and fold or stir with a wooden spoon or spatula until evenly combined. Sprinkle in a tablespoon or two more flour if the dough is too sticky, and add in a tablespoon or two of cream if it is too dry. The dough should come together into a sticky thick dough with very little unincorporated dry ingredients.
  3. On a floured surface, bring the dough together to be smooth and divide it into two equal sized pieces. Pat each piece of dough out into a flat  6” circle. Do not overwork the dough. Transfer the dough to the pans, spacing out the two pieces. Using a sharp knife, cut each circle into 6 wedges. Brush the tops with the remaining 2 tablespoons of heavy cream using a pastry brush. Place the pan of scones in the fridge or freezer for 10-15 minutes to rest as this will help the scones to rise well. Bake in the preheated oven for about 20 minutes or until the edges of the scones have browned and the center of the scones are no longer doughy. Allow the scones to cool for about 10 minutes before covering or piping with glaze.
  4. To prepare the glaze, combine the confectioner’s sugar with the vanilla bean paste and 1 tablespoon of milk. Add more milk to achieve your desired consistency. Spoon or drizzle the glaze on top of the cooled scones and sprinkle with additional sprinkles if desired. Enjoy!

Did you make this recipe?

Share a photo and tag us — we can’t wait to see what you’ve made!

Vanilla Bean Scones Read More »

Blueberry Cream Cheese Biscuits

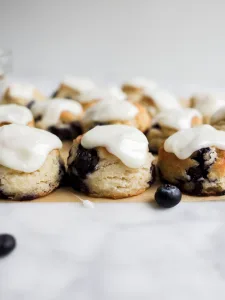
Blueberry Cream Cheese Biscuits recipe by Wood and Spoon. These are soft and fluffy southern style biscuits filled with butter and cream cheese. The glaze is a creamy frosting and the icing add sweetness to the pastry. These are great treats with fresh blueberries for weekday breakfast or weekend brunch. inspired by Callie's hot little biscuits, this food feels special and makes the mornings more fun. Find the recipe and how-to at thewoodandspoon.com by Kate Wood.

Does it get any better than homemade biscuits? I’ve been the self-professed biscuit lady for a number of years now, and I could not be more thrilled to add another recipe to the Wood & Spoon repertoire. These blueberry cream cheese biscuits are a long time coming, and when I tell you they are worth the wait… well, they are.

Blueberry Cream Cheese Biscuits recipe by Wood and Spoon. These are soft and fluffy southern style biscuits filled with butter and cream cheese. The glaze is a creamy frosting and the icing add sweetness to the pastry. These are great treats with fresh blueberries for weekday breakfast or weekend brunch. inspired by Callie's hot little biscuits, this food feels special and makes the mornings more fun. Find the recipe and how-to at thewoodandspoon.com by Kate Wood.

Storebought is… Fine?

I’ve been making homemade biscuits for so long that, up until recently, I almost forgot about the alternatives. You know- storebought biscuits, refrigerated doughs, and even the freezer ones that you just pop on the pan and warm up. They’ve been all but foreign to me. Don’t get me wrong- there are plenty of semi-homemade or convenience foods that I buy with very little hesitation, but once you’ve tasted a really easy (and really good!) homemade biscuit, it’s hard to go back. You know?

Blueberry Cream Cheese Biscuits recipe by Wood and Spoon. These are soft and fluffy southern style biscuits filled with butter and cream cheese. The glaze is a creamy frosting and the icing add sweetness to the pastry. These are great treats with fresh blueberries for weekday breakfast or weekend brunch. inspired by Callie's hot little biscuits, this food feels special and makes the mornings more fun. Find the recipe and how-to at thewoodandspoon.com by Kate Wood.

Then, the other day, we were serving breakfast to a rather large crew after church. I caved and bought a Costco-sized bag of frozen biscuits. It was so easy! Oven: preheated. Baking pan: lined with parchment. Hot biscuits: ready in 12 minutes. They even really looked good- golden tops, steamy fluffed insides, perfectly round size. Maybe I had been tricking myself all these years. Maybe homemade biscuits weren’t really that much better.

Blueberry Cream Cheese Biscuits recipe by Wood and Spoon. These are soft and fluffy southern style biscuits filled with butter and cream cheese. The glaze is a creamy frosting and the icing add sweetness to the pastry. These are great treats with fresh blueberries for weekday breakfast or weekend brunch. inspired by Callie's hot little biscuits, this food feels special and makes the mornings more fun. Find the recipe and how-to at thewoodandspoon.com by Kate Wood.

Homemade Biscuits > All Other Alternatives

But then it came time to trying them. I took a biscuit, slathered it with last summer’s strawberry fig jam, and took a bite. First chew: good texture. Second chew: not bad. Third, fourth, and fifth bite: oh, no.

What even is this? That greasy film on the roof of my mouth? That gummy texture caking my teeth? The butter flavor that, honestly, was more movie theater artificial than anything else. The frozen biscuit I tried that morning was nothing like my homemade ones. It was so, so much worse than I remembered.

Blueberry Cream Cheese Biscuits recipe by Wood and Spoon. These are soft and fluffy southern style biscuits filled with butter and cream cheese. The glaze is a creamy frosting and the icing add sweetness to the pastry. These are great treats with fresh blueberries for weekday breakfast or weekend brunch. inspired by Callie's hot little biscuits, this food feels special and makes the mornings more fun. Find the recipe and how-to at thewoodandspoon.com by Kate Wood.

Blueberry Cream Cheese Biscuits

I’ll be honest: vindication tastes almost as good as these blueberry cream cheese biscuits. These homemade biscuits, just like the millions I’ve made in the past, really are the best. They have it all: buttery crisp edges, soft insides, layers throughout, and loads of real butter flavor. With fresh blueberries and a cream cheese glaze, these blueberry cream cheese biscuits have balanced sweetness and great texture. I cannot emphasize enough how delicious they are. So let me tell you how to make them.

Blueberry Cream Cheese Biscuits recipe by Wood and Spoon. These are soft and fluffy southern style biscuits filled with butter and cream cheese. The glaze is a creamy frosting and the icing add sweetness to the pastry. These are great treats with fresh blueberries for weekday breakfast or weekend brunch. inspired by Callie's hot little biscuits, this food feels special and makes the mornings more fun. Find the recipe and how-to at thewoodandspoon.com by Kate Wood.

How to Make Blueberry Cream Cheese Biscuits

Almost all of my biscuit recipes start the same way. First, we whisk together the dry ingredients. All-purpose flour, baking powder, baking soda, salt, and sugar come together in a bowl. Next, we cut in the cream cheese and butter using a pastry cutter, just until the fats are incorporated in pea-sized chunks. Why use cream cheese? Cream cheese works as a substitute for some of the butter and adds a subtle flavor and softness. I learned this trick years ago from Carrie of Callie’s Hot Little Biscuit whose cream cheese biscuits are delightfully soft and fluffy. After tossing in the blueberries, we stir it all together with a little cold buttermilk.

Blueberry Cream Cheese Biscuits recipe by Wood and Spoon. These are soft and fluffy southern style biscuits filled with butter and cream cheese. The glaze is a creamy frosting and the icing add sweetness to the pastry. These are great treats with fresh blueberries for weekday breakfast or weekend brunch. inspired by Callie's hot little biscuits, this food feels special and makes the mornings more fun. Find the recipe and how-to at thewoodandspoon.com by Kate Wood.

The dough is thick and shaggy, but, working quickly, we bring it together and pat it out on a floured surface. A floured round biscuit butter comes next, and we trim out pieces of dough before popping them into a super-hot oven. Once baked, the cream cheese glaze tops these biscuits that truly are divine.

How to Revive Leftover Biscuits

Lots of foods are best the very first day, but I’ll be honest: I almost prefer these biscuits the next day. Once frosted, these blueberry cream cheese biscuits will soften overnight and lose a lot of their crispy edges. To revive them, I place them on a lined baking sheet in a toaster oven or traditional oven that is preheated to 350 degrees. I like to let mine reheat until they’re a shade darker than when they started. As a result, the edges crispy up, the insides warm, and even the glaze on top crisps slightly, leaving behind a flaky almost-donut glaze. (Insert me drooling.)

Blueberry Cream Cheese Biscuits recipe by Wood and Spoon. These are soft and fluffy southern style biscuits filled with butter and cream cheese. The glaze is a creamy frosting and the icing add sweetness to the pastry. These are great treats with fresh blueberries for weekday breakfast or weekend brunch. inspired by Callie's hot little biscuits, this food feels special and makes the mornings more fun. Find the recipe and how-to at thewoodandspoon.com by Kate Wood.

Given these blueberry cream cheese biscuits a try and let me know what you think! Happy baking to you all and have a great Sunday.

If you like these blueberry cream cheese biscuits, you should make:

Cream Cheese Chocolate Chip Biscuits
Peaches and Cream Biscuits
Funfetti Biscuits
Cinnamon Raisin Biscuits

Print

Blueberry Cream Cheese Biscuits

5 Stars 4 Stars 3 Stars 2 Stars 1 Star

5 from 1 review

These blueberry cream cheese biscuits have soft, fluffy centers, fresh berries, and a sweetened cream cheese glaze on top!

  • Author: Kate Wood
  • Prep Time: 10
  • Cook Time: 20
  • Total Time: 30 minutes
  • Yield: 12
  • Category: Biscuits

Ingredients

For the biscuits:

  • 2 cups (280 gm) all-purpose flour
  • 2 teaspoons baking powder
  • ¼ teaspoon baking soda
  • 1 tablespoon sugar
  • ½ teaspoon salt
  • 4 ounces cream cheese, at room temperature
  • ¼ cup (55 gm) unsalted butter, cold, plus 2 tablespoons melted
  • ¾ cup fresh blueberries
  • ¾ cup (180 gm) cold buttermilk

For the topping:

  • 2 ounces cream cheese, at room temperature
  • 1 cup (115 gm) powdered sugar
  • 1–2 tablespoons milk

Instructions

To make the biscuits:

  1. Preheat the oven to 450 degrees. In a large bowl, combine the flour, baking powder, baking soda, sugar, and salt. Use the back of a fork or a pastry cutter to cut in the cream cheese and butter until large, pea-sized clumps exist throughout. Stir in the blueberries and then add the buttermilk, stirring to combine. Dump the shaggy dough out onto a floured surface and used floured hands to gently pat the dough out into a 1” rectangle. Fold the dough in thirds like a letter and then pat it out again into 1” thickness. Use a 2” biscuit cutter to cut out rounds of dough. Gently combine the scraps and then pat out that mixture to 1” thick again. Cut out additional rounds. Place the dough rounds 2″ apart onto a baking sheet and brush the tops with the melted butter. Place the pan in the oven, reduce the heat to 400, and bake for about 18-20 minutes or until the tops are puffed and golden. You may need to rotate the pan towards the end of baking if one size is darkening faster than the other. Allow the biscuits to cool briefly while you prepare the topping.

To prepare the topping:

  1. Beat the cream cheese and powdered sugar in large bowl just until smooth. Add a tablespoon or more or milk to get the icing a smooth, spreadable consistency. Smooth a dollop on each biscuit and serve immediately!

Did you make this recipe?

Share a photo and tag us — we can’t wait to see what you’ve made!

Blueberry Cream Cheese Biscuits Read More »

Cinnamon Streusel Bread

Cinnamon Streusel Bread by Wood and Spoon blog. This is a simple fluffy coffee cake loaf filled with a cinnamon brown sugar filling and topped with a crumbly streusel. The end result is a yummy quick bread that tastes great as breakfast or dessert. Learn how to make this make ahead brunch bread on thewoodandspoon.com.

With St. Patrick’s Day coming up tomorrow, I have been thinking about all the things we chalk up to luck: things like the weather, a catch made by our favorite team, or even a good hair day. Over the years, I’ve given luck a whole bunch of credit to luck without really considering if there was more at play. Is the goodness in my life really just an accident, something that happened by chance? Or is it possible that all of the “luck” in my life is actually a gift offered intentionally for me at the very moment I need it? Before we dive into this cinnamon streusel bread, let’s talk about favor.

Cinnamon Streusel Bread by Wood and Spoon blog. This is a simple fluffy coffee cake loaf filled with a cinnamon brown sugar filling and topped with a crumbly streusel. The end result is a yummy quick bread that tastes great as breakfast or dessert. Learn how to make this make ahead brunch bread on thewoodandspoon.com.

Favor

A friend of mine from church introduced the concept of favor to me a few years ago. She didn’t throw it on me or force me to accept her version of things as truth; instead she offered up her perspective for my consideration. The idea, basically, is this: God loves us. He wants good things for us. And He’s always at work on our behalf. Could it be possible that every good thing in our life is not just luck or a result of our own actions but, instead, a little sign of love from God? What if that open parking space, the dollar bill in the back of old jeans, or various other happy coincidences are really just nuggets of favor lavished on you by a loving Father? My mind was blown.

Cinnamon Streusel Bread by Wood and Spoon blog. This is a simple fluffy coffee cake loaf filled with a cinnamon brown sugar filling and topped with a crumbly streusel. The end result is a yummy quick bread that tastes great as breakfast or dessert. Learn how to make this make ahead brunch bread on thewoodandspoon.com.

The following week, I saw evidence of it all around me. It seemed that the more I looked out for the good things in my life, the more I found them. Perfect weather at a picnic I planned for friends? A last-minute opening at a restaurant I’ve been dying to go to? Even a single afternoon in my home where everyone is content and joyful and kind to one another. I began to look at each one of those things as a gift and the end result was a whole lot of love and gratitude.

Cinnamon Streusel Bread by Wood and Spoon blog. This is a simple fluffy coffee cake loaf filled with a cinnamon brown sugar filling and topped with a crumbly streusel. The end result is a yummy quick bread that tastes great as breakfast or dessert. Learn how to make this make ahead brunch bread on thewoodandspoon.com.

Now, I’m all in. At times, I forget to look for signs of grace and love at work in my life, but the second I open my eyes again, it’s all around me. My kids, new opportunities, the magnolia tree blooming outside of my room, or even just a wildly pink streak of clouds in a dusky sunset- it’s all favor, all love. Anyways.. just for for thought. 🙂

Cinnamon Streusel Bread

Now, onto the main event: cinnamon streusel brad. I’ve continued my venture to bake more breakfast items, and this cinnamon streusel bread is serious. Honestly guys, I love it so much. Soft cakey insides, a swirl of brown sugar and cinnamon throughout, and a crumbly topping. It’s truly so delicious and the perfect thing to enjoy for breakfast (or dessert??) this weekend. Let me tell you how to make it.

Cinnamon Streusel Bread by Wood and Spoon blog. This is a simple fluffy coffee cake loaf filled with a cinnamon brown sugar filling and topped with a crumbly streusel. The end result is a yummy quick bread that tastes great as breakfast or dessert. Learn how to make this make ahead brunch bread on thewoodandspoon.com.

First we start with the batter. Butter, oil, and two kinds of sugar come together with eggs and vanilla. Flour and leavening come next with a splash of buttermilk. Next comes the topping. Flour, brown sugar, salt, and melted butter stir together until dry clumps form. We layer the batter in a prepared pan and swirl in the cinnamon sugar filling. Finish it off with the crumble and bake for an hour or until a clean toothpick comes out. Voila!

Give this cinnamon streusel bread a try and lmk what you think! Happy Thursday, Happy St. Patty’s and Happy Baking!

Cinnamon Streusel Bread by Wood and Spoon blog. This is a simple fluffy coffee cake loaf filled with a cinnamon brown sugar filling and topped with a crumbly streusel. The end result is a yummy quick bread that tastes great as breakfast or dessert. Learn how to make this make ahead brunch bread on thewoodandspoon.com.

If you like this cinnamon streusel bread you should try:

Coffee Cake Muffins
Banana Bread Cake
Banana Zucchini Bread
Mom’s Homemade Bread
Whole Wheat Chocolate Chip Muffins

Print

Cinnamon Streusel Bread

5 Stars 4 Stars 3 Stars 2 Stars 1 Star

5 from 2 reviews

This cinnamon streusel bread is a fluffy coffee cake swirled with a cinnamon sugar filling and topped with brown sugar crumble!

  • Author: Kate Wood
  • Prep Time: 15
  • Cook Time: 60
  • Total Time: 1 hour 15 minutes
  • Yield: 1 Loaf
  • Category: Breakfast Bread

Ingredients

For the batter:


  • 1/2 cup unsalted butter, at room temperature
  • 3 tablespoons vegetable oil
  • 1/2 cup sugar
  • ½ cup brown sugar, packed
  • 2 large eggs, room temperature
  • 2 teaspoons vanilla
  • 2 cups cups all-purpose flour
  • 1 ¼ teaspoon baking powder
  • 1/4 teaspoon baking soda
  • ½ teaspoon salt
  • 2/3 cup full-fat buttermilk

For the filling:

  • ½ cup brown sugar, packed
  • 1–1/2 teaspoons cinnamon

For the streusel:

  • ½ cup all-purpose flour
  • ¼ cup light brown sugar packed
  • ½ teaspoon cinnamon
  • ½ teaspoon salt
  • 3 tablespoons unsalted butter, melted

Instructions

  1. Preheat the oven to 350 degrees. Lightly grease a 9×5” loaf pan and set aside.
  2. In a large bowl or the bowl of a stand mixer, cream together the butter, oil, sugar, and brown sugar on medium speed until smooth, about one minute. Add the eggs and vanilla and beat to combine. Add 1 cup of the flour, the baking powder, baking soda, and salt and beat on low just until almost combined. Add the buttermilk, stir, and then mix in the remaining flour. Beat on low until the batter is smooth and uniform, but do not over-mix. Combine the brown sugar and cinnamon for the filling in a small bowl. Spoon half of the batter into the prepared pan and smooth. Top with the streusel. Add the remaining batter and smooth. Finally, prepare the streusel. Combine the flour, brown sugar, cinnamon and salt in a small bowl. Stir in the melted butter, just until clumps form. Sprinkle on top. Bake in the pre-heated oven about 50-60 minutes or until the top is domed and a toothpick inserted comes out clean.

Did you make this recipe?

Share a photo and tag us — we can’t wait to see what you’ve made!

Cinnamon Streusel Bread Read More »

Overnight Buttermilk Biscuits (& A Gift guide!)

Overnight Buttermilk Biscuits by Wood and Spoon Blog. This is a make-ahead Southern biscuit dough that can be prepared the night before and baked fresh in the morning! Learn how to make flaky, buttery, pull-apart biscuits on thewoodandspoon.com

The other day, I saw a meme that said, “It feels like today is January 57th,” and that couldn’t be more true for me. This month has been full, in every context of the word, and I could not be more grateful that February is only a day away. If you’ve followed along with this site for any length of time, you know I LOVE February. I love all the pink and chocolates, I love the heart-shaped Valentine’s Day paraphernalia, and I even love the stay-inside weather. So naturally, I thought we’d kick off the month (a day early) with a girly gift list and some overnight buttermilk biscuits. Let’s start with the gifties.

Overnight Buttermilk Biscuits Valentine Gift Guide

A Gift List for You(rself) or Your Galentine!

1. Puff Sleeve Top from J.Crew Soft cotton and accented sleeves come at an easy price for this top.
2. Faux Orchid Real orchids are wonderful, but these faux ones stay pretty all year long with little effort.
3. HER DAILY BREAD My first book, Her Daily Bread, stays in style all year long.
4. Alpaca Beanie These beanies are so soft and scrumptious that I bought some for a few friends too.
5. Je T’aime Frame This frame is backordered, and you better believe I’m on the waiting list.
6. Wrap Pajamas These kimono style pjs from LAKE are silky soft and pretty too.
7. Rose Gold Photo Locket These lockets offer engraving and etching of inner photos as well.
8. Williams-Sonoma Dish Towels My favorite dish towels come in pink, just in time for February!
9. Recycled Cashmere Crew Neck Sweater These sustainable cashmere sweaters from Reformation are at the top of my list!
10. Salt and Pepper Mills I fell in love with these petite mills while in NYC. I may or may not have already gifted them twice since.
11. Hyaluronic Acid Lipstick My favorite lip shade now comes in a silky smooth moisturizing stick!
12. AT THE ARTISAN’S TABLE I’m dying to get my hands on this beautiful book that features tablescapes prepared by artists.

Overnight Buttermilk Biscuits by Wood and Spoon Blog. This is a make-ahead Southern biscuit dough that can be prepared the night before and baked fresh in the morning! Learn how to make flaky, buttery, pull-apart biscuits on thewoodandspoon.com

Overnight Buttermilk Biscuits

Now, onto the cozy stuff.

You know I love biscuits. An adaptable starchy treat that serves as an option for breakfast, lunch, and dinner? Sign me up. But sometimes, making fresh biscuits first thing in the morning isn’t in the cards. For those kind of days, these overnight buttermilk biscuits are the ticket. Here, a butter-packed dough comes together hours in advance so that you can bake and serve them at your leisure. It’s the morning convenience of the refrigerated can biscuits but without that greasy mouthfeel. Truly, these are awesome.

Overnight Buttermilk Biscuits by Wood and Spoon Blog. This is a make-ahead Southern biscuit dough that can be prepared the night before and baked fresh in the morning! Learn how to make flaky, buttery, pull-apart biscuits on thewoodandspoon.com

Making the Biscuits

To make these overnight buttermilk biscuits, we start with the dry ingredients. Stir together all-purpose flour, leavening and loads of salt. Next, cut ice cold butter into the dry mixture until the mixture has uniform clumps throughout. Finally, stir in the buttermilk until a shaggy dough comes together.

Overnight Buttermilk Biscuits by Wood and Spoon Blog. This is a make-ahead Southern biscuit dough that can be prepared the night before and baked fresh in the morning! Learn how to make flaky, buttery, pull-apart biscuits on thewoodandspoon.com

I pat the dough together, knead slightly, and then begin trimming out rounds of dough with a floured round cutter. Be sure not to overwork the dough- this will yield a tough, chewy biscuit. Place the dough rounds on a parchment paper-lined sheet pan and cover the entire thing with plastic wrap. When you’re ready to bake them the next morning, preheat the oven and pop them in for about 12-15 minutes!

I hope you give these overnight buttermilk biscuits a try and let me know how you enjoy them. Happy (almost!) February and happy baking!

Overnight Buttermilk Biscuits by Wood and Spoon Blog. This is a make-ahead Southern biscuit dough that can be prepared the night before and baked fresh in the morning! Learn how to make flaky, buttery, pull-apart biscuits on thewoodandspoon.com

If you like these overnight buttermilk biscuits you should try:

Funfetti Biscuits
Mini Garlic Herb Biscuits
Cheddar Cornmeal Biscuits
Mini Buttermilk Biscuits
Maple Oatmeal Biscuits

Print

Overnight Buttermilk Biscuits

5 Stars 4 Stars 3 Stars 2 Stars 1 Star

5 from 2 reviews

These overnight buttermilk biscuits feature flaky layers and can be made a night in advance!

  • Author: Kate Wood
  • Prep Time: 10
  • Cook Time: 15
  • Total Time: 25 minutes
  • Yield: 18
  • Category: Bread

Ingredients

  • 3 cups all-purpose flour
  • 2 teaspoons sugar
  • 2 teaspoons kosher salt
  • 1 tablespoon baking powder
  • 3/4 teaspoon baking soda
  • 1 cup unsalted butter, cold and diced
  • 1 ¼ cups buttermilk, cold
  • Extra butter for brushing, if desired

Instructions

  1. Preheat the oven to 425 degrees and line a baking pan with a sheet of parchment. Set aside.
  2. In a large bowl, combine the flour, sugar, salt, powder, and soda.  Use a pastry cutter or the backs of two forks to cut in the butter until evenly dispersed with pea-sized clumps throughout. Gently stir in the buttermilk until a shaggy dough forms, being careful to NOT OVERWORK. Sprinkle 2 tablespoons of flour out onto a clean work surface and dump the crumbly dough on to the flour. Gently and quickly work the dough together, kneading a few times, before patting out into a 1” rectangle. Use a 2” round biscuit cutter to trim out rounds of dough. Flour the cutter well and press down straight being careful not to twist the cutter at all. Re-flour and continue cutting out until all the dough has been used. You can gather leftover piece and gently form back together to trim out more circles. Place the biscuits about 1” apart on the baking sheet or dish. Brush with a bit of the melted butter and bake in the preheated oven for about 17 minutes or until the tops are golden and the biscuits have risen. Allow to cool slightly before enjoying and reheat in the toaster oven as needed.

Did you make this recipe?

Share a photo and tag us — we can’t wait to see what you’ve made!

Overnight Buttermilk Biscuits (& A Gift guide!) Read More »

Whole Wheat Chocolate Chip Muffins

Whole Wheat Chocolate Chip Muffins by Wood and Spoon blog by Kate Wood. This quick and easy muffin recipe uses whole wheat flour, brown sugar, and semisweet chocolate chips to make a fluffy, moist muffin. each is topped with a simple streusel. For a healthy spin on a chocolate lover's breakfast favorite, try these muffins! Find the recipe on thewoodandspoon.com

What better way to start the weekend than with a healthy(ish) breakfast treat like these whole wheat chocolate chip muffins? With brown sugar, a simple streusel, and loads of semisweet chocolate chips, these cookie-flavored baked goods also have the added benefit of whole wheat flour! If you’re looking for something to enjoy all weekend long, these are IT.

Whole Wheat Chocolate Chip Muffins by Wood and Spoon blog by Kate Wood. This quick and easy muffin recipe uses whole wheat flour, brown sugar, and semisweet chocolate chips to make a fluffy, moist muffin. each is topped with a simple streusel. For a healthy spin on a chocolate lover's breakfast favorite, try these muffins! Find the recipe on thewoodandspoon.com

On Family Breakfast

In the hay day of this website, there was no shortage of breakfast pastries to enjoy in the morning. You needn’t look farther than my kitchen counter or the freezer drawer to find stacks of danishes, homemade pop-tarts, and slices of quick bread. I was constantly testing recipes, and, as a result, I had the leftovers to show for it. As you can imagine, my family got used to these kind of things, and mornings were actually quite pleasant.

But then something called “REAL LIFE” happened, and as much as I would have loved to keep up with our stock of sugary breakfast treats, it just wasn’t happening. Instead, I offered easy stuff: Toast. Dry cereal. The occasional scrambled egg. You know, normal American breakfast foods.

Whole Wheat Chocolate Chip Muffins by Wood and Spoon blog by Kate Wood. This quick and easy muffin recipe uses whole wheat flour, brown sugar, and semisweet chocolate chips to make a fluffy, moist muffin. each is topped with a simple streusel. For a healthy spin on a chocolate lover's breakfast favorite, try these muffins! Find the recipe on thewoodandspoon.com

Unrealistic Expectations

So last week, when I pulled out a Tupperware of chocolate chip muffins, my kids lost their mind. I mean, seriously, head over heels. It was all, “MOM, YOU MAKE THE BEST BREAKFAST,” and, “THESE MUFFINS ARE INCREDIBLE,” and (my personal favorite), “SERIOUSLY, YOU ARE THE BEST MOM EVER!” Truly, in that moment, the clouds parted and I heard *actual* angels singing.

Here’s what I decided: I showed my hand too quickly. By having a surplus of homemade treats for a good portion of their life, they haven’t figured out that this isn’t normal in most houses. What kind of 8-year-old knows they prefer croissant over pain au chocolat? What average 6-year-old complains because there’s no more funfetti biscuits in the freezer? I’ll tell you: ones that haven’t been fed enough Fruity Pebbles, that’s who.

Whole Wheat Chocolate Chip Muffins by Wood and Spoon blog by Kate Wood. This quick and easy muffin recipe uses whole wheat flour, brown sugar, and semisweet chocolate chips to make a fluffy, moist muffin. each is topped with a simple streusel. For a healthy spin on a chocolate lover's breakfast favorite, try these muffins! Find the recipe on thewoodandspoon.com

The good news for them is that I’m testing loads of breakfast recipes this month, so there’s bound to be a few stragglers to munch in the coming weeks. The bad news is that I’m on to them and there will definitely be some granola bars and Cheerios in their very near future.

Whole Wheat Chocolate Chip Muffins

While they were inhaling the muffins, I kept one little secret from them: these are almost kinda sorta healthy! I mean, sure, there’s sugar and chocolate involved, but doesn’t that addition of whole wheat flour make all of us feel a smidge better? Plus, these whole wheat chocolate chip muffins are really good. So good that I ate a whole one during the photo shoot while trying to “get the perfect shot” of a bitten muffin. I won’t even lie- one bite would have been a fine photo.

Whole Wheat Chocolate Chip Muffins by Wood and Spoon blog by Kate Wood. This quick and easy muffin recipe uses whole wheat flour, brown sugar, and semisweet chocolate chips to make a fluffy, moist muffin. each is topped with a simple streusel. For a healthy spin on a chocolate lover's breakfast favorite, try these muffins! Find the recipe on thewoodandspoon.com

To make these whole wheat chocolate chip muffins, we start with the wet ingredients. Sour cream, oil, an egg, and some vanilla stir together before adding in a mixture of brown and white sugar. Next comes the dry ingredients. Equal parts all-purpose and whole wheat flour stir in with leavening and salt. Finally, the chocolate chips fold in and the streusel sprinkles on top. Voila!

The muffins bake up into soft, slightly chewy treats with rounded, chocolate-studded top. They taste even better on day 2, although I recommend rewarming. If you are in need of a new treat to wow your family and friends- these are it! Happy Friday and happy baking to you!

If you like these whole wheat chocolate chip muffins you should try:

Whole Wheat Blueberry muffins
Banana Nutella Muffins
Healthyish Chocolate Chip Cookies
Cream Cheese Chocolate Chip Biscuits
Chocolate Chip Bundt Cake

Print

Whole Wheat Chocolate Chip Muffins

5 Stars 4 Stars 3 Stars 2 Stars 1 Star

5 from 1 review

These whole wheat chocolate chip muffins are simple and fluffy, loaded with semisweet chips and topped with a streusel!

  • Author: Kate Wood
  • Prep Time: 5
  • Cook Time: 18
  • Total Time: 23 minutes
  • Yield: 12
  • Category: Breakfast

Ingredients

 For the streusel (optional):

  • 1–1/2 tablespoons all-purpose flour
  • 1 tablespoon sugar
  • 1 tablespoon unsalted butter, at room temperature
  • ¼ cup chocolate chips 

For the muffins:

  • ¾ cup sour cream
  • 1/3 cup (80 gm) vegetable oil
  • 1 large egg
  • 1 teaspoon vanilla extract
  • ½ cup (100 gm) sugar
  • 1/2 cup (100 gm) brown sugar packed
  • 3/4 cup (105 gm) all-purpose flour
  • 3/4 cup (105 gm) 100% whole wheat flour (see notes)
  • 2–1/2 teaspoons baking powder
  • ½ teaspoon salt
  • 1 cup semisweet chocolate chips

Instructions

  1. Preheat an oven to 400 degrees Fahrenheit and put paper muffin lines in a 12-compartment tin.
  2. First, make the streusel. Stir together the flour and sugar and use the back of a fork to cut in the butter until the mixture consists of moist clumps. Stir in the chocolate chips and set aside.
  3. Next, make the muffins. In a large bowl, whisk together the sour cream, oil, egg, and extract until smooth. Stir in the sugars. Add the flours, baking powder, and salt, stirring just till barely combined. Fold in the chocolate chips. Divide the batter among the 12-muffin compartment. Mine usually end up about 2/3- 3/4 of the way full. Sprinkle the streusel on top. Bake in the preheated oven for about 18 minutes or until a toothpick inserted comes out clean. Allow to cool briefly before consuming!

Notes

  • As an option, you can use 1-1/2 cups of whole wheat flour and only ½ cup of all-purpose flour. In this instance, use ½ cup brown sugar and only ¼ cup of white sugar. This will help to keep the muffins moist.
  • If you don’t plan to consume the muffins on the day of preparing them, seal them in a Tupperware or large plastic bag and freeze until ready to consume. This will help to keep the muffins moist and fresh!

Did you make this recipe?

Share a photo and tag us — we can’t wait to see what you’ve made!

Whole Wheat Chocolate Chip Muffins Read More »

Easy Banana Zucchini Bread with Cream Cheese Butter

Easy Zucchini Banana Bread by Wood and Spoon blog. My favorite way to use up ripe bananas and summer zucchini is this quick bread! Served with a simple whipped cream cheese butter and loaded with pecans, bananas, cinnamon, and fresh zucchini, this bread is a delicious breakfast or snack treat! find the recipe and how to on thewoodandspoon.com

Well, we made it to the end of the summer! I’m on Day 2 with a half-empty house, and working from home has never seemed so fun. Every summer, I forget how challenging it is to keep up with recipe testing and photography jobs; apparently working with children hanging on your ankles is easier said than done.

Luckily, the kids and I were able to work on a few recipes together. Today’s easy banana zucchini bread came together in an attempt to use up our squash reserves, and it. is. GOOD. With the addition of a whipped cream cheese butter spread, it is really worth writing home about. Let me tell you all about it.

Easy Zucchini Banana Bread by Wood and Spoon blog. My favorite way to use up ripe bananas and summer zucchini is this quick bread! Served with a simple whipped cream cheese butter and loaded with pecans, bananas, cinnamon, and fresh zucchini, this bread is a delicious breakfast or snack treat! find the recipe and how to on thewoodandspoon.com

Easy Banana Zucchini Bread

The idea for this banana zucchini bread came from a recent trip to Atlanta. My mom, nana, sister, and I traveled east to do some antique shopping. Thankfully, our hotel had a delightful breakfast spot that served delicious breakfast breads. My favorite was their zucchini bread that came with a whipped cream cheese spread. I immediately knew this was a recipe to recreate at home.

My version of the quick bread is slightly different due to the addition of banana. We have an endless supply of bananas in our house, and they’re rarely yellow and prime for eating. Instead, the green bananas collect dust and the brown ones get even more brown. So I decided to create an outlet for all the dying fruits of the world. Bananas, meet zucchini, your new BFF.

Making the Bread

Making this banana zucchini bread is pretty simple. In a single bowl, mash together the bananas and oil. Add the sugar, eggs, and extract, stirring all the while. Next comes the dry ingredients which, for this recipe, includes cinnamon; I just love the subtle addition of spice. The shredded zucchini and optional pecans add in last before two loaves bake in the oven.

The cream cheese spread is optional but really yummy. Slightly sugared and more buttercream than buttery, it really take this bread over the top. Make it or don’t, but certainly it’s worth trying once.

Easy Zucchini Banana Bread by Wood and Spoon blog. My favorite way to use up ripe bananas and summer zucchini is this quick bread! Served with a simple whipped cream cheese butter and loaded with pecans, bananas, cinnamon, and fresh zucchini, this bread is a delicious breakfast or snack treat! find the recipe and how to on thewoodandspoon.com

I hope you all get to bake this easy banana zucchini bread soon. If you do, let me know what you think! Happy Saturday and happy baking!

If you like this easy banana zucchini bread you should try:

Carrot Pound Cake
Whole Wheat Carrot Muffins
Vanilla Butter Loaf
Banana Bread Cake
Banana Crumb Cake

Easy Zucchini Banana Bread by Wood and Spoon blog. My favorite way to use up ripe bananas and summer zucchini is this quick bread! Served with a simple whipped cream cheese butter and loaded with pecans, bananas, cinnamon, and fresh zucchini, this bread is a delicious breakfast or snack treat! find the recipe and how to on thewoodandspoon.com
Print

Easy Banana Zucchini Bread

5 Stars 4 Stars 3 Stars 2 Stars 1 Star

5 from 1 review

This banana zucchini bread is an easy, no-frills recipe that makes for a delicious breakfast or afternoon snack!

  • Author: Kate Wood
  • Prep Time: 20
  • Cook Time: 60
  • Total Time: 1 hour 20 minutes
  • Yield: 2 Loaves
  • Category: Quick Bread

Ingredients

For the bread:

  • 1 cup mashed ripe banana (from about 3 medium-sized bananas)
  • 1 cup canola oil
  • 2 cups sugar
  • 4 large eggs
  • 2 teaspoons vanilla extract
  • 3–1/3 cups all-purpose flour
  • 2–1/2 teaspoons cinnamon
  • 1 teaspoon salt
  • 1–1/2 teaspoons baking powder
  • 1–1/2 teaspoons baking soda
  • 1–1/2 cups shredded zucchini
  • 1 cup chopped pecans (optional)

For the cream cheese butter:

  • 4 ounces cream cheese, softened to room temperature
  • 2 tablespoons salted butter, softened to room temperature
  • 1–1/2 cups powdered sugar
  • ½ teaspoon cinnamon, optional

Instructions

To make the loaves:

  1. Preheat the oven to 350 degrees and spray two 8”x4” loaf pans with baking spray. Set aside.
  2. In a large bowl, stir to combine the banana, oil, sugar, eggs, and extract. Add in the flour cinnamon, salt, baking powder, and baking soda and fold to combine. Add in the shredded zucchini and pecans, folding just until combined. Divide the batter between the two prepared pans and bake in the preheated oven until a toothpick inserted comes out clean, about 1 hour. Allow to cool completely.
  3. In the meantime, prepare the cream cheese butter. In a medium-sized bowl, use a hand mixer to combine the cream cheese and butter, beating until smooth, about 1 minutes. Add the powdered sugar and optional cinnamon, stirring to combine. If you wish to smooth out the mixture a bit, add a tablespoon of water or milk. Otherwise, pop the spread in the fridge until you’re ready to serve it on slices of the zucchini bread.

Did you make this recipe?

Share a photo and tag us — we can’t wait to see what you’ve made!

Easy Banana Zucchini Bread with Cream Cheese Butter Read More »

Family Waffle

Family Waffle by Wood and Spoon blog. This recipe from Sarah Copeland book Everyday is Saturday is a healthy dairy free waffle made with quinoa and chia seed. This makes 4 thick Belgian style waffles and is best served with maple syrup or a healthy portion of fresh fruit and yogurt. Read more about these make ahead and reheat breakfast treats on thewoodandspoon.com

I want to write a book. There. I said it. Now the world (aka, approximately 25 readers, if you include my Mom) knows my lifelong goal, my purpose for starting this blog. It’s the reason I spend my weekends baking 14 varieties of cinnamon bread. I am set on being an author and that’s that.Family Waffle by Wood and Spoon blog. This recipe from Sarah Copeland book Everyday is Saturday is a healthy dairy free waffle made with quinoa and chia seed. This makes 4 thick Belgian style waffles and is best served with maple syrup or a healthy portion of fresh fruit and yogurt. Read more about these make ahead and reheat breakfast treats on thewoodandspoon.com

When I was growing up, my Nana would take me to Joseph Beth Booksellers. We perused the store for hours (no joke), and I’d get lost, both in the literal and proverbial sense, flipping through pages and roaming the aisles. In the end, I’d carry my little stack of books to the register, and Nana, without fail, bought me each and every one of them. She taught me to treasure the fresh pages of a good book, and it was there that my interest in reading began.

Even now as an adult I love to read, although the content of the stories is different. I read memoirs and cookbooks and pages about faith. My bookshelves are only moderately filled, but seeing the colorful little spines arranged in stacks and rows brings me all kinds of joy because it feels good to revisit the old favorites from years past. I love to feel the worn edges and textured papers in my hands.

“Books are uniquely portable magic. ” -Stephen King

If you can’t tell, I’m dying to write a book. One of these days I will be an author. I can’t say what it will be about, whether it will be worth its salt, or when it will happen, but I’m determined to make a contribution to the craft that has inspired me for so long. Admitting it all out loud, especially here on this site, feels scary, but I think I need to move forward believing it’s possible. Some dreams are worth risking a little face over, and this is one of mine. I’m going to do it.

Family Waffle by Wood and Spoon blog. This recipe from Sarah Copeland book Everyday is Saturday is a healthy dairy free waffle made with quinoa and chia seed. This makes 4 thick Belgian style waffles and is best served with maple syrup or a healthy portion of fresh fruit and yogurt. Read more about these make ahead and reheat breakfast treats on thewoodandspoon.com

Everyday is Saturday

When I first saw Sarah Copeland’s new book, Everyday is Saturday, I said out loud, “This is a book I would love to write.” The photos were beautiful. The writing was real. Every recipe looked phenomenal. Even the concept of the book, recipes for cooking well throughout the week, was cheeky and relatable. THIS was the kind of book I wanted to write. Every page had ingredients that made my tummy applause. Flipping through the pages, I felt as if I was in Sarah’s kitchen; every page turn fanned the flame of desire that I had to create my own book.

Family Waffle by Wood and Spoon blog. This recipe from Sarah Copeland book Everyday is Saturday is a healthy dairy free waffle made with quinoa and chia seed. This makes 4 thick Belgian style waffles and is best served with maple syrup or a healthy portion of fresh fruit and yogurt. Read more about these make ahead and reheat breakfast treats on thewoodandspoon.com

One look through her book, and you’ll know she’s an adoring mother. Each chapter is freckled with images of her children enjoying her food. I found myself envisioning Aimee, George, and Charlie saddled up to the counter to enjoy her recipes. Sarah’s recipe for this family waffle is precisely the type of thing I love to serve the kids in the morning: a warm and comforting treat, slightly sweet, and healthyish. I knew they were a must-try and messaged Sarah to ask if I could share the recipe.

Family Waffle

These waffles are great for those following a gluten-free or dairy-free diet. They’re also delicious enough to make even an average Joe want to enjoy a few. A few of the out-of-the-ordinary ingredients, like cooked quinoa and chia seeds, are included for texture and create a dish with unique flavor, a bit more complex than you run of the mill eggo. Plus, those healthier ingredients mean I have no problem enjoying a hearty portion. It’s a feel good breakfast option with all the gusto of a Saturday morning meal.

Family Waffle by Wood and Spoon blog. This recipe from Sarah Copeland book Everyday is Saturday is a healthy dairy free waffle made with quinoa and chia seed. This makes 4 thick Belgian style waffles and is best served with maple syrup or a healthy portion of fresh fruit and yogurt. Read more about these make ahead and reheat breakfast treats on thewoodandspoon.com

Sarah recommends serving this waffle with a bit of yogurt and a fried egg, but I opted for yogurt and some fruit I had on hand. For the kids, I offered a pat of butter and a generous pour of syrup, and they devoured each bite, seeds and all. Additionally, I could see this waffle being topped with fresh berries and whipped ricotta, baked apples and the cinnamon-flavored run-off juices, or even just schmear of plain Jane peanut butter. Think of this waffle as the vehicle for all of your favorite toppings and enjoy as such. It’s truly a treat.

Give this waffle a try and let me know what you think! Thanks for playing a part in my dreams and joining me here each week. Happy baking!

If you like this family waffle you should try:

Apple Pecan Dutch Baby

Buttermilk Pancakes

Maple Oatmeal Biscuits

Almost Vegan White Chocolate Coconut Pancakes

Print

Sarah Copeland’s Family Waffle

5 Stars 4 Stars 3 Stars 2 Stars 1 Star

5 from 3 reviews

This family waffle recipe is a dairy and gluten-free breakfast treat. Recipe excerpted from Everyday is Saturday by Sarah Copeland, reprinted with permission from Chronicle Books

  • Author: Sarah Copeland
  • Prep Time: 5
  • Cook Time: 15
  • Total Time: 20 minutes
  • Yield: 4
  • Category: Breakfast

Ingredients

  • 1 1/2 cups (235 g) gluten-free flour blend or (210 g) all-purpose flour
  • 3 tablespoons cooked quinoa, cooled
  • 2 tablespoons chia seeds
  • 2 teaspoons unrefined cane sugar
  • 1 1/2 teaspoons baking powder
  • 1/2 teaspoon fine sea salt
  • 1 1/2 cups (360 ml) real milk
  • 1/2 cup (120 ml) vegetable oil, plus more for the waffle iron
  • 2 large eggs, lightly beaten
  • 1 teaspoon pure vanilla extract
  • Plain yogurt (optional) and fresh berries (or any fruit), for serving
  • 4 eggs, fried, for serving (optional)
  • Pure maple syrup, for serving

Instructions

  1. Preheat a waffle iron (we like a Belgian waffle maker, but any will work). Whisk together the flour, quinoa, chia seeds, sugar, baking powder, and salt. In a separate bowl, whisk together the milk, oil, eggs, and vanilla. When your waffle iron is hot and ready to use, stir the milk mixture into the flour mixture until just combined; the batter will be loose, the consistency of heavy cream.
  2. Spray or brush the waffle iron very lightly with oil. (If your waffle iron is seasoned or nonstick, you should only need to do this once before you begin, not between every waffle, which makes them taste greasy.) Ladle 1 heaping cup (240 ml) of the batter into the waffle iron and cook until golden brown, 12 to 14 minutes. Set aside on a rack while you cook the remaining waffles to keep them crispy (stacking will make them steam and get soggy). Serve the waffles warm with berries, a dollop of yogurt or a fried egg (if desired), and a drizzle of maple syrup, or anything else you desire.
  3. Keep prepared batter in the refrigerator, covered, up to overnight. Or bake the waffles, cool, and freeze them in batches of two in large resealable freezer bags. To eat, bring to room temperature for 5 to 10 minutes, and toast to warm through. If you are making them fresh to order, you should know—as my kids and guests do—that waffle cooking is a one-by-one affair; everyone is allowed to eat their waffle hot and fresh off the press, when they’re best, while the rest cook.

Did you make this recipe?

Share a photo and tag us — we can't wait to see what you've made!

Family Waffle Read More »

Funfetti Rolls

Funfetti Rolls by Wood and Spoon. These are morning sweet buns filled with a birthday cake flavored filling that makes breakfast feel like a party. This overnight dough can be made ahead and the bun are baked and frosted with a cream cheese sprinkle icing. Using Milk Bar birthday cake crumbs, butter and sugar as the filling, these "cinnamon rolls" are the most fun way to do brunch. Find the recipe by Kate Wood on thewoodandspoon.com

It’s been a while since we’ve included some sprinkles in our lineup here. The sprinkles, birthday cake flavor, and bright colors that make up these funfetti rolls make me feel like we’re celebrating, and you guys know how much I love a party. Our mornings deserve something extra-special, extra-festive, extra-fun, don’t you think? If you ask me, these funfetti rolls are just the ticket.

With all of the breakfast recipes we’ve been sporting on this site this month, mornings have been seriously special in my house lately. The other morning I prepared my kids what is, to use, a normal healthy breakfast and they were appalled. Like, where’s the cinnamon rolls, Mom? Where’s the chocolate bread and pound cake and muffins? WHERE IS THE SUGAR IN THIS BREAKFAST? Clearly I need to send the little sugar junkies to breakfast bootcamp for a little reset.

Funfetti Rolls by Wood and Spoon. These are morning sweet buns filled with a birthday cake flavored filling that makes breakfast feel like a party. This overnight dough can be made ahead and the bun are baked and frosted with a cream cheese sprinkle icing. Using Milk Bar birthday cake crumbs, butter and sugar as the filling, these "cinnamon rolls" are the most fun way to do brunch. Find the recipe by Kate Wood on thewoodandspoon.com

Funfetti Rolls

These funfetti rolls really do not help the cause. Aimee caught a glimpse of a test round of these buns on the counter and literally lost all chill. Within 3 minutes she had dragged a stool over to the counter, climbed onto the marble, and was nibbling on sprinkles from the sticky tops of these treats. The look on her face was equal parts guilt and delight, because, let’s be honest- there’s not a kid (read: human) in the world that doesn’t get a little bit excited by the site of sprinkles. They’re so special that I really couldn’t blame her.

Funfetti Rolls by Wood and Spoon. These are morning sweet buns filled with a birthday cake flavored filling that makes breakfast feel like a party. This overnight dough can be made ahead and the bun are baked and frosted with a cream cheese sprinkle icing. Using Milk Bar birthday cake crumbs, butter and sugar as the filling, these "cinnamon rolls" are the most fun way to do brunch. Find the recipe by Kate Wood on thewoodandspoon.com

So these funfetti rolls are maybe the most fun you can have in your morning. Yes, they take time to prepare, and , yes, there’s several steps involved. But are they worth it? Yes. Will they make your kids/roommate/BFF feel like the most special kid on the block? For sure. And do they taste ridiculously close to the funfetti box cake mix you grew up loving? Yep. If you’re tracking with me let’s chat the ins and outs of these rolls. You’re going to love them.

To make these funfetti rolls we start with the dough. I adapted my overnight cinnamon roll dough to work for this recipe. It’s the same fluffy, lightly sweetened yeast dough that I’ve grown to love, and while it does take some time to rise and roll, you can certainly follow the instructions from that original recipe to space out the work overnight. While we wait for the dough to proof we can go ahead and prepare the birthday cake crumb filling.

Funfetti Rolls by Wood and Spoon. These are morning sweet buns filled with a birthday cake flavored filling that makes breakfast feel like a party. This overnight dough can be made ahead and the bun are baked and frosted with a cream cheese sprinkle icing. Using Milk Bar birthday cake crumbs, butter and sugar as the filling, these "cinnamon rolls" are the most fun way to do brunch. Find the recipe by Kate Wood on thewoodandspoon.com

Making the Rolls

You might remember these crumbs from the funfetti ice cream cake I made a while back, but these little beauties are the same recipe that Christina Tosi made famous at NYC’s Milk Bar. With little more than cake flour, sprinkles, and sugar, we whip up a wet, crumbly dough that bakes into crispy, cake mix-favored crumbles. The essential ingredient here is the clear vanilla extract. Regular vanilla simply will not do if you want to recreate that box cake flavor. You can find the extract at your grocery store, craft stores, or online here. Follow the instructions to create the little crumbles, allow them to cool, and then whiz them in a blender or food processor to grind them to a coarse sand consistency. If you’d like to shorten the day-of baking process, feel free to make and freeze these crumbs in advance.

Funfetti Rolls by Wood and Spoon. These are morning sweet buns filled with a birthday cake flavored filling that makes breakfast feel like a party. This overnight dough can be made ahead and the bun are baked and frosted with a cream cheese sprinkle icing. Using Milk Bar birthday cake crumbs, butter and sugar as the filling, these "cinnamon rolls" are the most fun way to do brunch. Find the recipe by Kate Wood on thewoodandspoon.com

Rolling and Filling the Rolls

When your dough is ready to roll, use a lightly floured surface and rolling pin to flatten out a large rectangle of dough. Spread your melted butter all over the dough to serve as the glue for your birthday cake crumbs, sugar, and sprinkles. Roll the dough into a long log and slice 1-1/4-1-1/2″ segments to turn out into your pan. For softer, gooier rolls, you can snuggle them into the pan closely, but if you’re looking for those perfect spirals, space them out about 2″ apart in your baking dish. Bake until the tops are barely bronzed and the internal temp reads 180 degrees. Do not overbake! Underbaked cinnamon rolls taste way better than dried out overbaked ones, so if you have a thermometer, now is the time to use it!

Funfetti Rolls by Wood and Spoon. These are morning sweet buns filled with a birthday cake flavored filling that makes breakfast feel like a party. This overnight dough can be made ahead and the bun are baked and frosted with a cream cheese sprinkle icing. Using Milk Bar birthday cake crumbs, butter and sugar as the filling, these "cinnamon rolls" are the most fun way to do brunch. Find the recipe by Kate Wood on thewoodandspoon.com

These funfetti rolls finish nicely with a sweet cream cheese frosting and a dusting of sprinkles. You can use your extra birthday cake crumbs as a garnish as well, but if you’re anything like me those little guys will already have long been consumed. These breakfast treats put the FUN in FUNfetti and are worth every ounce of the effort they require. Give them a try and let me know what you think! Happy baking, y’all!

If you like these funfetti rolls you should check out:

Overnight Cinnamon Rolls

Bananas Foster Cinnamon Rolls

Sweet Potato Cinnamon Rolls

Hazelnut Cinnamon Rolls

Chocolate Sweet Rolls

Print

Funfetti Rolls

5 Stars 4 Stars 3 Stars 2 Stars 1 Star

5 from 3 reviews

These funfetti rolls have all the birthday cake flavor wrapped up in a morning roll. Topped with a sweet cream cheese and sprinkle frosting!

  • Author: Kate Wood
  • Prep Time: 60
  • Cook Time: 60
  • Total Time: 240
  • Yield: 14
  • Category: Breakfast

Ingredients

For the dough:

  • 1 cup (240 gm) milk, lukewarm
  • ¼ cup (60 gm) water, lukewarm
  • 1 tablespoon active dry yeast
  • 6 tablespoons (85 gm)unsalted butter, melted but not too hot
  • 1 large egg plus 2 egg yolks
  • 1 tablespoon of clear vanilla extract
  • ½ cup (100 gm) brown sugar
  • 2-3/4 cups (385 gm) all-purpose flour
  • 1-1/2 cups (210 gm) bread flour
  • ½ teaspoon salt

For the funfetti crumbs (recipe adapted from Christina Tosi):

  • ½ cup (100 gm) sugar
  • 1-1/2 tablespoons (25 gm) brown sugar, packed
  • ¾ cup (90 gm) cake flour
  • ½ teaspoon baking powder
  • ½ teaspoon salt
  • 2 tablespoons rainbow sprinkles
  • ¼ cup (50 gm) canola oil
  • 1 tablespoon clear vanilla extract

For the rolls:

  • 6 tablespoons unsalted butter, melted and cooled
  • 3 tablespoons sprinkles
  • 2 tablespoons sugar

For the frosting:

  • 4 ounces cream cheese, at room temperature
  • ¼ cup (55 gm) unsalted butter, at room temperature
  • 1 cup (115 gm) powdered sugar
  • 2+ tablespoons of milk

Instructions

To prepare the dough:

  1. In the bowl of a stand mixer or a large bowl, combine the milk and water and sprinkle the yeast over top of it. Allow the yeast to dissolve, about 5 minutes. Stir in the butter, egg, egg yolks, clear vanilla extract, and sugar until smooth. In a small bowl, combine the flour, bread flour, and salt. Dump about half of the dry ingredients into the yeast mixture and stir until combined. Pour in the remaining dry ingredients and knead in the bowl using the dough hook attachment until smooth and slightly tacky, about 7 minutes. If you notice your dough isn’t pulling away from the sides of the bowl or it’s too wet, add flour 2 tablespoons at a time until the dough pulls away from the sides of the bowl and forms a little dough “tornado” around the dough hook. Once done kneading, place the dough into a large lightly greased bowl and cover tightly with plastic wrap to double in size, about 1-1/2 – 2 hours. Meanwhile, prepare the crumbs.

To prepare the crumbs:

  1. Preheat the oven to 300 degrees Fahrenheit and line a rimmed baking sheet with parchment or silicone baking sheet. In the bowl of a stand mixer, combine the sugar, brown sugar, cake flour, baking powder, salt, and sprinkles on low speed. Add the oil and extract all at once and continue to paddle on low speed until small clumps form throughout. Spread the crumbs out onto the baking sheet and bake for about 15 minutes, stirring twice throughout. Allow to cool completely and then use a food processor (or a plastic bag, rolling pin, and brute strength) to pulverize the clumps into a coarse, sand-like crumb. Set aside while you wait for your dough.

To prepare the rolls:

  1. Once the dough has risen, dump it out onto a lightly floured surface and use a floured rolling pin to roll it into a 10” x 22” rectangle. Spread the melted butter all over the dough and sprinkle on the sprinkles, sugar, and about ¾ of the funfetti crumbs. Starting with one of the long ends, tightly roll the dough from end to end and pinch the edges together to seal. Cut the dough into 1-1/2” sections and lay them out 2” apart in a lightly greased baking dish. Cover with plastic wrap or a tea towel and allow to rise on the counter for about 30 minutes or in the fridge overnight. Preheat the oven to 350 degrees and bake in the oven for about 22-25 minutes or until the edges are barely golden and the internal temp is 190 degrees. Remove from the oven and prepare your frosting.

To prepare the frosting:

  1. Cream the cream cheese and butter in large bowl at medium speed until smooth, about 1 minute. Add the powdered sugar and milk and beat to combine. Add additional milk to thin out the frosting or more powdered sugar to thicken it. You can also gently warm the frosting to pour over the rolls as a glaze. Sprinkle with remaining funfetti crumbs or sprinkles, if desired.

Notes

  • Crumbs cake be made in advance! You can even make double and use the rest as an ice cream topping, cake filing, or just to scarf down on your own.
  • Clear vanilla extract is ESSENTIAL for getting that funfetti/ birthday cake flavor. You can find it at most grocery or craft stores.

Did you make this recipe?

Share a photo and tag us — we can't wait to see what you've made!

Funfetti Rolls Read More »